INSTALLING AND ACTIVATION
NCheck software is available for following platforms
Windows
Linux
Android
iOS
Server |
Admin Client |
Attend Client |
Source |
|
Windows |
|
|
|
Windows installer |
Windows |
|

|
|
Windows docker image |
Linux |
|
|
|
Linux docker image |
Android |
|
|
|
Google Paly Store and APK download |
iOS |
|
|
|
Apple App Store |
Install for windows
Download windows installer from https://www.ncheck.net web site. This installer has following components
NCheck Server
NCheck Admin Client
NCheck Attend client
Note
NCheck Server installation also installs NCheck Admin client. NCheck Attend client and Admin client cannot be installed together. Administrator privilege is required to install NCheck on windows.
Note
Before install NCheck for Windows, make sure that you have installed the latest Windows updates in your computer.
To proceed with the installation, execute the downloaded installation file. It will proceed you through the following screens.
Accept NCheck license and agreement.
Figure 24 License agreement dialogue
Select Next button
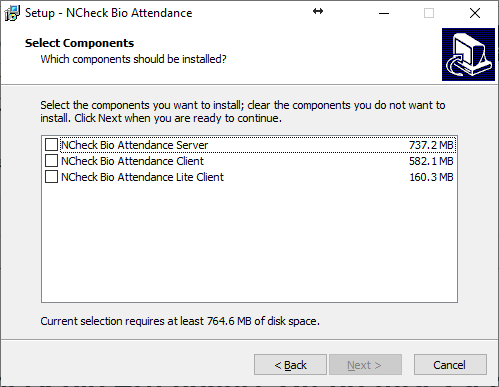
The components need to be installed. NCheck server and NCheck Admin can be installed together or separately. NCheck Attend client can be installed separately from other components
Figure 25 Select components dialogue
Select Next button
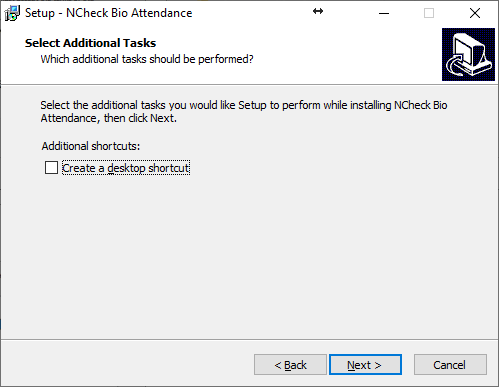
Select Create a desktop shortcut option to create a shortcut to open NCheck client application if installed

Figure 26 Select additional tasks
Select Next button
Review the install configuration before install the NCheck.
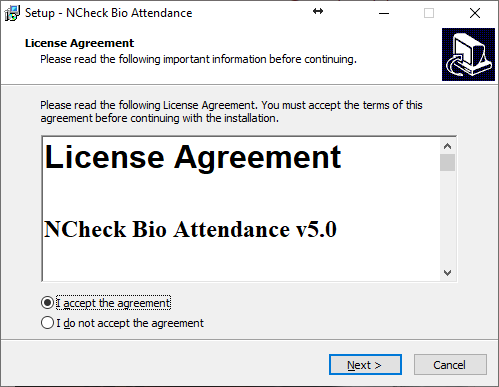
Figure 27 Ready to install dialogue
Select Install button to install application
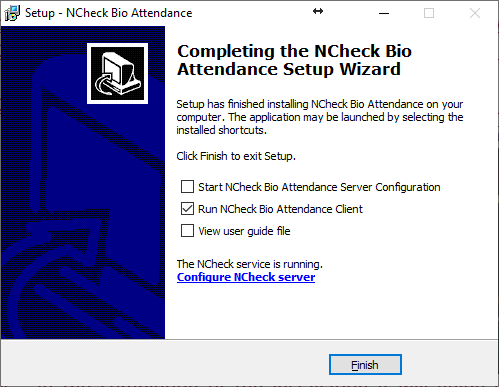
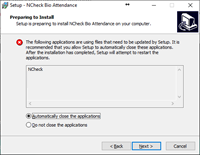
Once installation completed successfully, completion dialog will be shown as below. In the completion dialogue, you will be asked to
Start NCheck Server configuration
Run NCheck client
View the User’s Guide
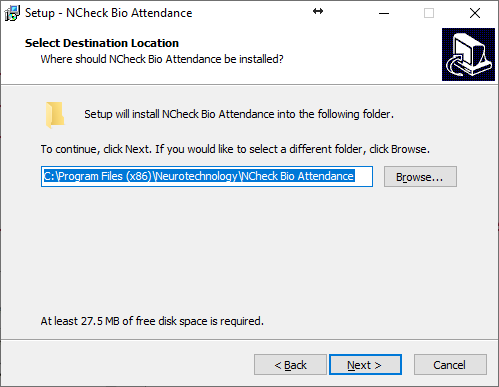
Figure 28 Completed dialogue
Select Finish button
Install server for Windows
To install NCheck server
Follow the Install for windows section above.
Select “NCheck Server” component as showing in Figure 33 Select components dialogue. It will also allow to select NCheck Admin Client component.
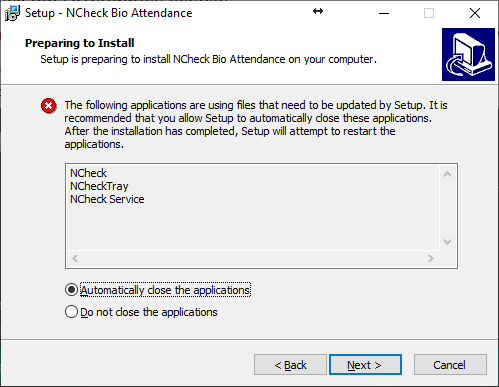
If this installation is an update of the existing installation it may ask to stop running tasks.
In the completion of the installation it will guide you to activate a license as showing in Figure 30 ..Please refer “License Activation” section for more details.
In installation completion, it will show the server installation completion dialog as showen in Figure 36
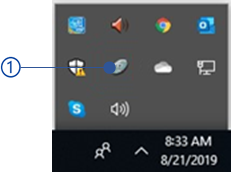
In successful completion, the Server will be installed, and the server icon will be appearing in the Windows system tray as shown in Figure 39 .
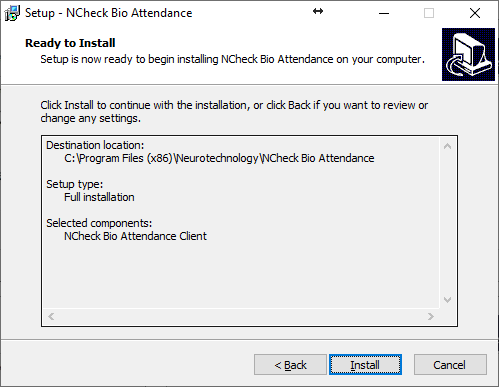
Figure 31 Tray icon
Install client For Windows
Follow the Install for windows section above
If this installation is an update of existing installation it may ask to stop running tasks
In installation completion, it will show the client installation completion dialogue as showen in Figure 311 in the completion window, You have following options
Run NCheck client
View the User’s Guide
Install for Linux
Follow this link to set up docker image for Linux. Refer Install On-premises server on Linux section for more details.
Install client for Android
Download and install NCheck Admin or NCheck Attend client from Google play store or APK download from https://www.ncheck.net/free-trials/.
Install NCheck Attend client for iOS
Install NCheck Attend client from Apple App Store.
Use extension
NCheck features can be extended or customized based on the customer requirements. The extended/customized features are provided as an extension(extension.jar) to the system. To place the extension,
Stop the server from the trey application menu as mentioned in Tray icon menu section.
Places the extension.jar in the root directory of the NCheck installation folder. For an example if the server has installed in C:Program FilesNeurotechnologyNCheck Visitor Management, the path of the extension.jar will be C:Program FilesNeurotechnologyNCheck Visitor Managementextension.jar
Start the server from the trey application menu as mentioned in Tray icon menu section.
Note
NCheck is validating the provided extension when server start using the filter signature due to the security concern.
Activation
NCheck Software licenses and Cloud subscription plan for different components are shown below.
Component |
License/Plan |
|
Server |
Cloud |
Monthly Subscription for a Plan |
On-Premises |
License for no of users |
|
Client |
Attend |
Free |
Admin |
License |
Cloud plans
After signing up for NCheck Cloud server account, user will be offered a free subscription. Account administrator can be changed to below plan. Refer pricing page for more information about cloud plans.
On-premises server and Admin client licenses
New installation of NCheck on-premises server and Admin client can be used for one-month trial period. After the expiration of the trial period, a valid license should be activated. Please contact us to purchase license for on-premises server and Admin clients.
License activation/deactivation
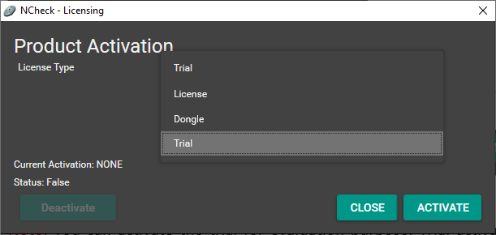
License Manager
The License manager option is used to activate licenses. License manager can be launched as below
NCheck on-premises server as shown in Figure 36
NCheck clients for Windows as shown in Figure 35
NCheck Admin client for Windows
NCheck Surveillance client for Windows
NCheck Android clients as shown in Figure 34
License Manager views are shown below
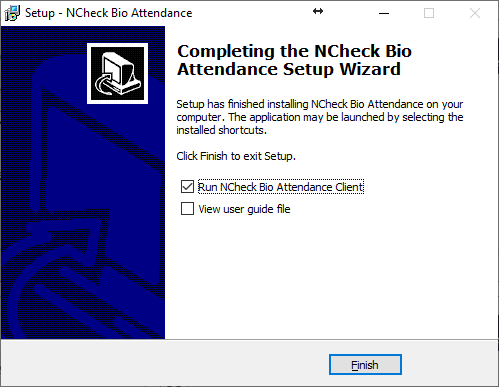
Figure 37 License manager view
Current activated license details
Current license type
Refer License types section for more details
License status
As obtained or not
License expiration date if exist
Current activation
Current activation as trial or non-trial.
Activation option
If the current activation is non-trial, select activation option for available
License text
License file
Dongle
This option available for Windows only.
License field
Field to enter/select license text/license
Activate button
Activate the selected license. The possible error messages are shown below.
Deactivate button
Deactivate the current license if the license is serial. Refer License deactivation section for more details.
Error code |
Error message |
2001 |
Trial license has expired. |
2002 |
License cannot be obtained |
2003 |
The license is already in use. |
2004 |
The license limit has exceeded. Please contact administrator/ NCheck support |
2005 |
No valid NCheck license has found. |
Note
Note: After activating NCheck Android client license, the application should be restated after clear from the memory.
License types
Following license types are available to activate the Admin clients for Windows and Android, Windows Surveillance client.
Trial
NCheck can use for 30 days period in the trial mode. An internet connection is required to activate the license and constant internet connection is required to maintain the activation. After the trial period, NCheck should be activated with a valid license.
License
License can be NCheck Serial number or internet license. It requires an internet connection to activate both licenses. After activation using serial number application can be used without internet. But if activation is performed using internet license, application must be connected with internet in order to validate the license. Application can be activated either the selecting the license file or license text.
Dongle
NCheck server and Windows client can be activated using activation dongle. Please contact NCheck support team for more details.
License deactivation
NCheck Internet and serial licenses work only in a specific device on which activation was carried out (unique hardware Id for this device is generated). But in some cases, a license should be stopped (deactivated) on this device and activated again. Deactivation is required in the following cases,
When you need to transfer another device
Device in which license was activated is malfunctioned.
Hardware components such as processors or hard disk have been changed.
User changed a device (a computer).
In Android 10 or later OS, it is strongly recommended to deactivate the serial number license, in case of re-installing the application. Deactivate the license before uninstalling and activate again after re-installing.
Also, it is strongly recommended to deactivate a license before reinstalling an operating system or installing a different OS version.
Deactivation should be performed on the same device where it was activated. When you have an internet connection, a license will be deactivated automatically. When a device is not connected to the internet, user will be asked a location within the device to save Deactivation ID, which can be used with the license file to deactivation uploading to the Neurotechnology website. To deactivate the license,
Select the Deactivate button
If the device is not connected to the internet, you will be asked to select a location in the device to save the deactivation id file
Upload the file with the serial number file to the Neurotechnology web site. Table 7 shows error messages that could appear for license deactivation.
Error code |
Error message |
2005 |
No valid NCheck license has found. |
2006 |
License deactivation has failed. The license has not been activated. |