REFERENCES
Scenario
Visit scenarios are predefined in the system. A scenario is used as a basis for creating a visit schedule. Visit scenario defines the visitor and appointment information collected during the booking or registration. Additionally, it can have scenario specific configurations. NCheck has 10 default scenarios. Each scenario addresses different applications.
Personal
To meet person in the organization.
Place
To visit a place like museum, art gallery, church, temple, Government office.
Banking
To visit financial institution like bank, finance company, etc.
Events
To attends events such as seminar, classes, exhibitions.
Hotel
Visitor access of rooms, restaurants in hotels, restaurants, clubs in a hotel
Consultancy
To meet consultant like a lawyer, doctor, teacher, government officials.
Smart access
Access offices, building by Visitors with electronic ID cards or passports.
Simple biometrics
Allow access to any visitor with a printed/electronic token or biometric.
Payment
Pay bills, advances etc.
Travel and entertainments
Visit cinema, drama, lectures, seminar, games.
If an existing scenario is not available for a customer scenario, custom visit scenario can be requested. Custom scenario is required if any of the predefined scenario does not fulfil the customer requirement. In such cases, customers can request a custom scenario for their requirements. The customs scenario is provided as an extension to the server with extension installation guidelines. Refer Use extension section for more details about installing extension.
Schedule
Schedule quick view
Schedule quick view shows the overview of the schedule.

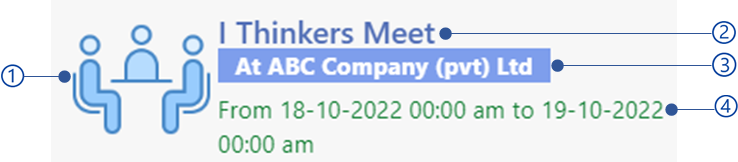
Figure 521 Schedule quick view for single appointment schedule
Schedule thumbnail
Schedule name
Schedule location
Schedule start and end date time
If the schedule is single appointment schedule, it will show appointment start and end date time. If the schedule is a session schedule, it shows the period starts and end date.
Filter schedules
Filter schedules simplify appointment creations from online or walk-in kiosks when there are large number of schedules available. Filter schedule view is shown below. This page can be accessed from the following URL. {server}:{port}/web/public/template/schedule_selection_public/html/{customer Code}
Server
Server name
Port
Service port configured on the server.
Customer code
A unique id receives after successful signup for the cloud.
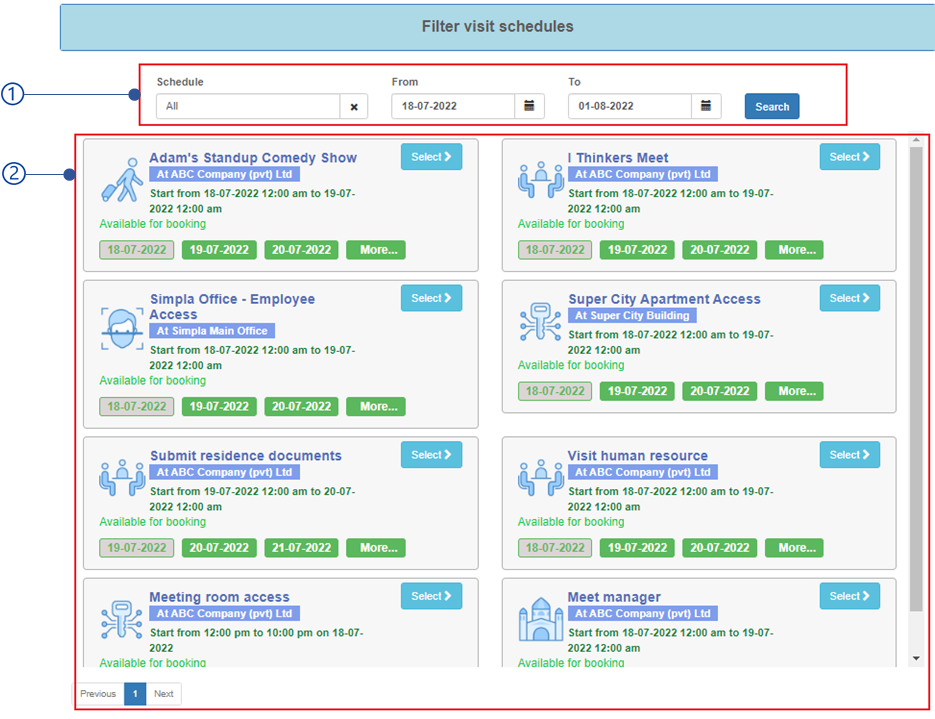
Figure 522 NCheck online filter schedules page
Filter view

Figure 523 Filter view of online booking page
Schedule
Filter by schedule name
From
Schedules start date
To
Schedules end date
Search button
Search schedules according to the selected filters.
Schedule list view
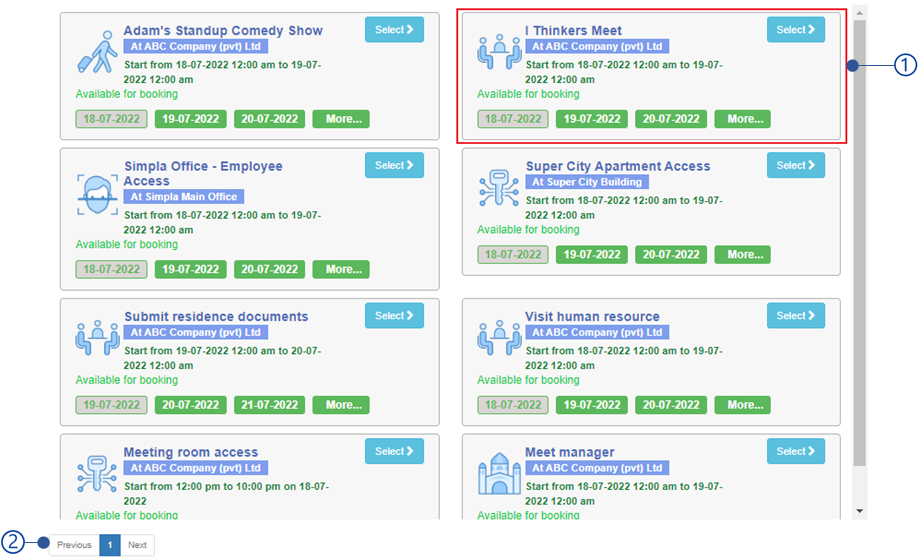
Figure 524 Schedule list view
Schedules paging view
Schedule view

Schedule date view
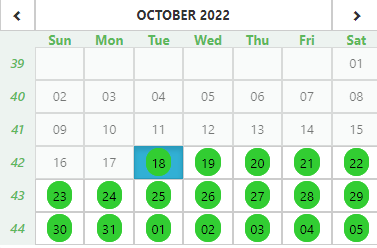
Appointments date view shows the dates allows to book appointments. If the schedule is a single appointment schedule, this allows to select appointment date. If schedule Is a session appointment schedule, this allows to select the period appointments should be created.

Figure 525 Schedule date view for single appointment schedule

Figure 526 Schedule date view for session appointment schedule
Appointment date view is shown below.
Select schedule date/period start date.
Schedule date quick view
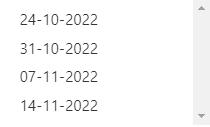
Schedule date quick view is showing first 2 appointment dates/period start date of the schedule. To browse all appointment dates/periods select the More button.
More button
More button allows to select appointment date/period from available as shown in Figure 527 and Figure 528 .
Schedules detail view
Schedule detail view shows the details about selected schedule date to book appointment.

Figure 529 Schedule detail view
Select button
Select schedule date and proceed to appointment booking.
Number of booked/available appointments
If the Slot occupancy is equal to 0, this view is showing number of booked appointments for selected schedule date. If the Slot occupancy is greater than 0, this view shows the number of available appointments to book for selected schedule date.
Time slots
When the Slot time is greater than 0 when creating schedules as mentioned in Add/edit visitor schedules section, the time slots are available to select when creating appointment as below.
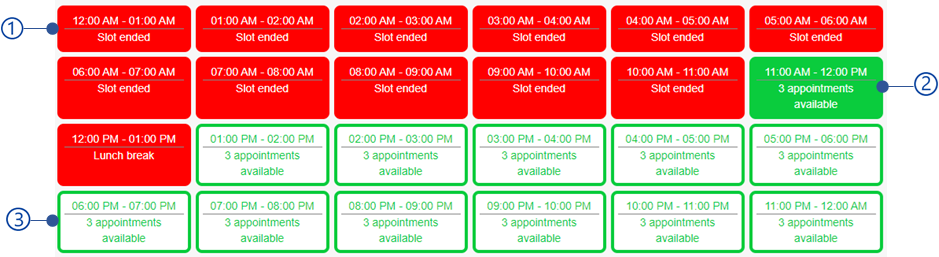
Figure 530 Time slot selection view
Unavailable time slot
The time slot is considered as unavailable if,
Slot end time has passed
Visitors are not allowed to book appointments for the slots already ended.
Time slot is fully booked
This applies if the Slot occupancy is greater than 0. Slot is unavailable if the number of appointments for the slot is equals to Slot occupancy
Time slots start and end time fully overlap with break time
when the schedule has break time, which start and end time overlap with the slot start and end time, visitors not allowed to book appointment for the time slot.
Selected time slot
Time slot view
Time slot view has shown in Figure 531 .
Break time indicator
If the time slot starts and end time is overlap with break start and end time break time indicator will appear. Break time indicator is showing when admin/visitor admin booking appointments as mentioned in New appointment section.
Time slots start and end time
Number of booked/available appointments
If the Slot occupancy is 0, then the number of booked appointments is showing. If the Slot occupancy is greater than 0, number of available appointments are showing.
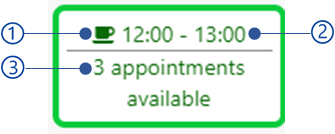
Figure 531 Time slot view
Seat selection
Seat selection is mandatory when booking an appointment if the schedule is created from travel and entertainment scenario. Seats can be configured for schedule as mentioned in Pricing configuration . Once configured the seat selection view will appear when booking the appointment as below.
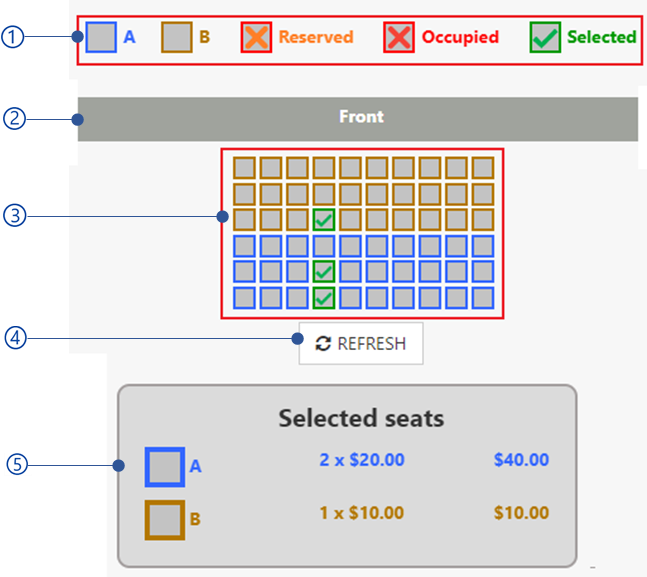
Figure 532 Seat selection view
Seat legend
Following types are available in the seat legend.
Seat categories
All seatings groups are showing in specific color with the group name as configured in the Pricing configuration .
Occupied seats
The seats already booked.
Reserved seats
The seats reserved by someone. Once a seat is reserved, it is not allowed select to book. Reserved seats are shown in the Add/edit appointment detail section.
Selected seats
Selected seats for the appointment.
Seat direction
Seat selection view
Selected seat details
All selected seats appeared in this section including number of seats, pricing for each group.
Note
Seat configuration can be customized as the customer requirement. Refer Use extension section for more details.
Visitor form
The Visitor form is used to take the visitor details when booking appointments. Visitor form can be built as mentioned in Visitor detail form builder section.
Note
The custom form fields can be delivered to the system as an extension based on customer request. Refer Use extension section for more detail.
Appointment completion
Once the appointment is made online and registration device, the appointment completion section will be shown.
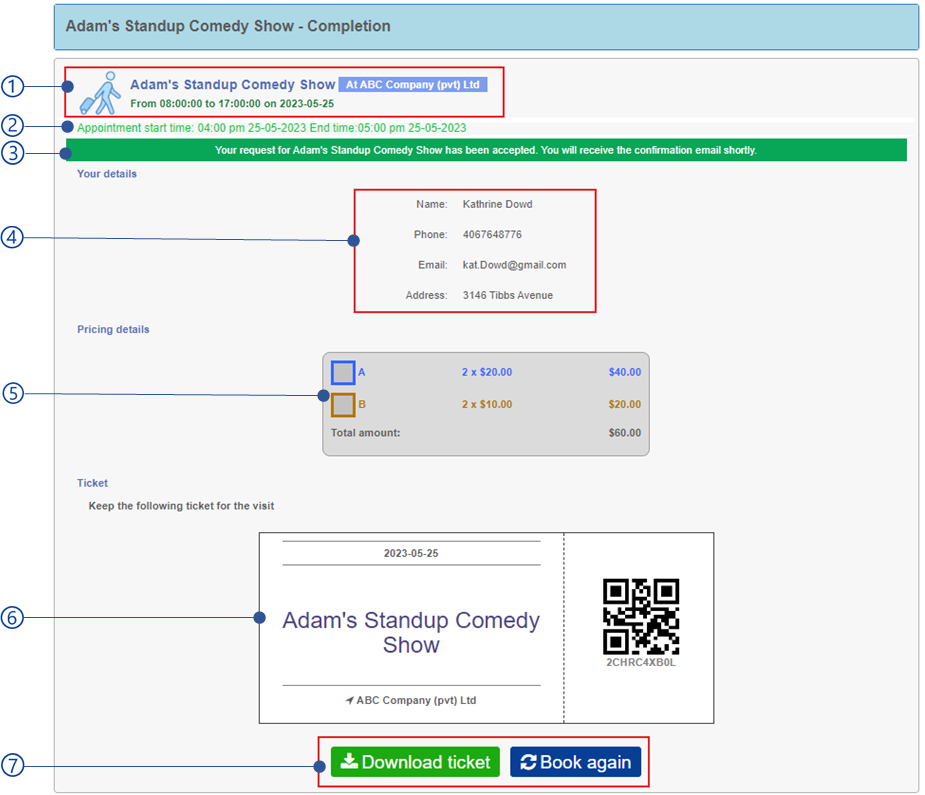
The appointment starts and end time.
Appointment completion status
There are 3 appointment completion statuses available.
Pending approval
If Automatic approval of visit requests setting in the schedule is disabled, appointments created by visitors will be shown as pending approval. The administrator should approve the appointment to complete the appointment.
Pending payment
When schedule has a payment configured with payment gateway, payment pending completion page is showing to complete the payment. Once payment is completed the successful completion will be shown
Successful
The appointment is successfully created.
Fail
Fail to create appointment. This can happen when fail to complete the payment through the payment gateway.
Visitor details
Pricing details
Action button
Action button appears depending on the appointment completion status. Following action buttons are available by default.
Pay now button
Proceed to the payment gateway if configured.
Download ticket button
Download ticket button appears in the booking page to download the ticket if Allow visitors to download pass setting is disabled in the schedule.
External executable trigger button
External executable trigger will be available once the external executable has configured for the schedule as mentioned in Ticket printing view section.
Book again button
Redirect to book new appointment again.
Note
Appointment completion page can be configured as per customer requirement.